Maven私服搭建
# 一文读懂 Nexus Maven 私服,新手也能轻松上手
搭建 Maven 私服通常是为了在企业内部管理依赖库,提高构建速度,以及确保依赖库的一致性和安全性。常用的 Maven 私服有 Nexus Repository Manager 和 Artifactory。下面我将分别介绍如何使用 Nexus Repository Manager 来搭建 Maven 私服。
# Nexus 私服安装
# JDK下载
下载 JDK17 版本
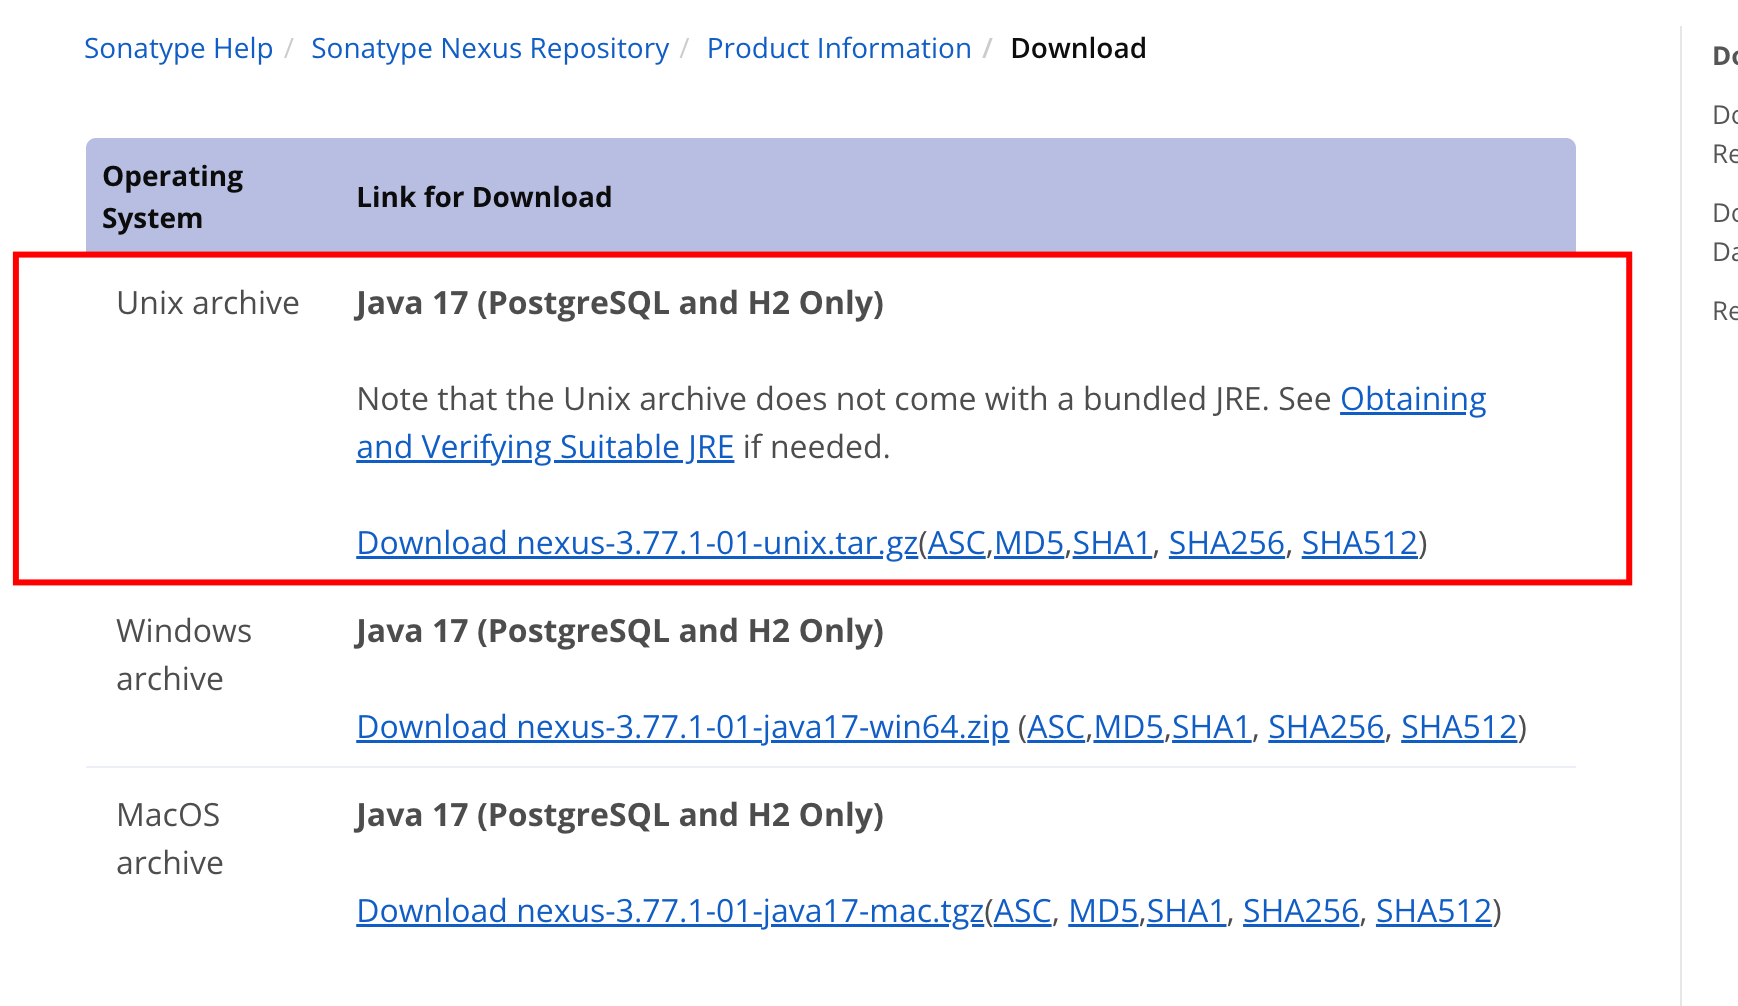
# Nexus下载
下载地址:https://help.sonatype.com/en/download.html (opens new window)
# 安装 Nexus
解压
tar -zxvf nexus-3.77.1-01-unix.tar.gz
# 配置 HTTPS
提示:
- 如果你使用 Maven 版本为 3.8 以后,要开启 HTTPS,否则 Maven 使用会提示错误
- 这里生成的证书是非安全证书,正式使用建议去购买证书
# 方案一:Nginx 配置
# 步骤 1:创建配置文件
新建 openssl.cnf 文件(关键配置):
[req]
prompt = no
default_bits = 4096
distinguished_name = dn
x509_extensions = v3_req

[dn]
CN = 192.168.1.1  # 通用名称填写IP地址

[v3_req]
keyUsage = keyEncipherment, dataEncipherment, digitalSignature
extendedKeyUsage = serverAuth
subjectAltName = @alt_names

[alt_names]
IP.1 = 192.168.1.1  # 必须用IP类型声明
# 如果需要域名支持可添加:
# DNS.1 = your.domain.com
2
3
4
5
6
7
8
9
10
11
12
13
14
15
16
17
18
# 步骤 2:生成证书
执行以下命令(一次性生成私钥和证书):
openssl req -x509 -newkey rsa:4096 -sha256 \
    -days 3650 -nodes \
    -config openssl.cnf \    # 指定配置文件
    -keyout server.key \     # 输出私钥文件
    -out server.crt          # 输出证书文件
2
3
4
5
# 步骤 3:验证证书内容
检查SAN字段是否正确:
openssl x509 -in server.crt -text -noout | grep -A1 "Subject Alternative Name"
正确输出示例:
X509v3 Subject Alternative Name:
    IP Address:192.168.1.1
2
# 步骤 4:配置Nginx
创建目录
mkdir -p /opt/nginx/certs
在/opt/nginx目录下创建nginx.conf文件
# 全局配置
user nginx;  # 指定 Nginx 工作进程的用户
worker_processes auto;  # 自动根据 CPU 核心数设置工作进程数量
error_log /var/log/nginx/error.log warn;  # 错误日志文件及日志级别
pid /var/run/nginx.pid;  # Nginx 进程 ID 文件路径

# events 模块配置
events {
    worker_connections 1024;  # 每个工作进程允许的最大连接数
}

# http 模块配置
http {
    include /etc/nginx/mime.types;  # 包含 MIME 类型配置文件
    default_type application/octet-stream;  # 默认 MIME 类型

    # 日志格式配置
    log_format main '$remote_addr - $remote_user [$time_local] "$request" '
                    '$status $body_bytes_sent "$http_referer" '
                    '"$http_user_agent" "$http_x_forwarded_for"';
    access_log /var/log/nginx/access.log main;  # 访问日志文件及使用的日志格式

    # 连接处理相关配置
    sendfile on;  # 开启高效文件传输模式
    tcp_nopush on;  # 与 sendfile 配合,提高网络传输效率
    keepalive_timeout 65;  # 保持连接的超时时间

    # server 块配置
    server {
        listen 4443 ssl;  # 监听 4443 端口,启用 SSL
        server_name 192.168.1.1;  # 服务器名称

        ssl_certificate /etc/ssl/certs/server.crt;  # SSL 证书路径
        ssl_certificate_key /etc/ssl/certs/server.key;  # SSL 私钥路径

        # location 块配置
        location / {
            # 开启代理功能
            proxy_pass http://192.168.1.1:8081;

            # 设置代理请求头,将客户端的真实 IP 传递给后端服务器
            proxy_set_header Host $host;
            proxy_set_header X-Real-IP $remote_addr;
            proxy_set_header X-Forwarded-For $proxy_add_x_forwarded_for;
            proxy_set_header X-Forwarded-Proto $scheme;

            # 代理连接超时时间
            proxy_connect_timeout 600;
            # 代理读取超时时间
            proxy_read_timeout 600;
            # 代理发送超时时间
            proxy_send_timeout 600;
        }
    }
}
2
3
4
5
6
7
8
9
10
11
12
13
14
15
16
17
18
19
20
21
22
23
24
25
26
27
28
29
30
31
32
33
34
35
36
37
38
39
40
41
42
43
44
45
46
47
48
49
50
51
52
53
54
55
将证书server.crt和私钥server.key放到目录/opt/nginx/certs
启动Nginx
docker run -d -p 4443:4443 \
  -v /opt/nginx/nginx.conf:/etc/nginx/nginx.conf \
  -v /opt/nginx/certs:/etc/ssl/certs \
  --name nginx nginx:latest
2
3
4

# 方案二:在 Nexus 中配置
# 生成https证书
进入目录
cd nexus-3.77.1-01/etc/ssl
创建配置文件openssl.cnf
[req]
distinguished_name = req_distinguished_name
req_extensions = v3_req
prompt = no

[req_distinguished_name]
# 国家代码
C = US
# 州或省
ST = State
# 城市
L = City
# 组织名称
O = Organization
# 组织单位
OU = Unit
# 通用名称,这里填写 IP 地址
CN = 192.168.1.1

[v3_req]
keyUsage = keyEncipherment, dataEncipherment
extendedKeyUsage = serverAuth
subjectAltName = @alt_names

[alt_names]
# 添加服务器的 IP 地址作为主题备用名称
IP.1 = 192.168.1.1
2
3
4
5
6
7
8
9
10
11
12
13
14
15
16
17
18
19
20
21
22
23
24
25
26
27
执行下面命令
在执行下面命令过程中会提示多次输入设置密码,统一为一个密码
# 生成带密码保护的私钥
openssl genrsa -des3 -out server.key 1024

# 生成证书签名请求(CSR),使用自定义配置文件
openssl req -new -config openssl.cnf -key server.key -out server.csr

# 生成自签名证书,使用自定义配置文件
openssl x509 -req -days 3650 -in server.csr -signkey server.key -extfile openssl.cnf -extensions v3_req > server.crt

# 去除私钥的密码保护
openssl rsa -in server.key -out server.key.unsecure

# 将私钥和证书导出为 PKCS12 格式
openssl pkcs12 -export -out keystore.pkcs12 -inkey server.key.unsecure -in server.crt

# 将 PKCS12 格式的密钥库转换为 JKS 格式
keytool -v -importkeystore -srckeystore keystore.pkcs12 -srcstoretype PKCS12 -destkeystore keystore.jks -deststoretype JKS
2
3
4
5
6
7
8
9
10
11
12
13
14
15
16
17
执行完成后在目录下有这些文件生成
keystore.jks keystore.pkcs12 server.crt server.csr server.key server.key.unsecure
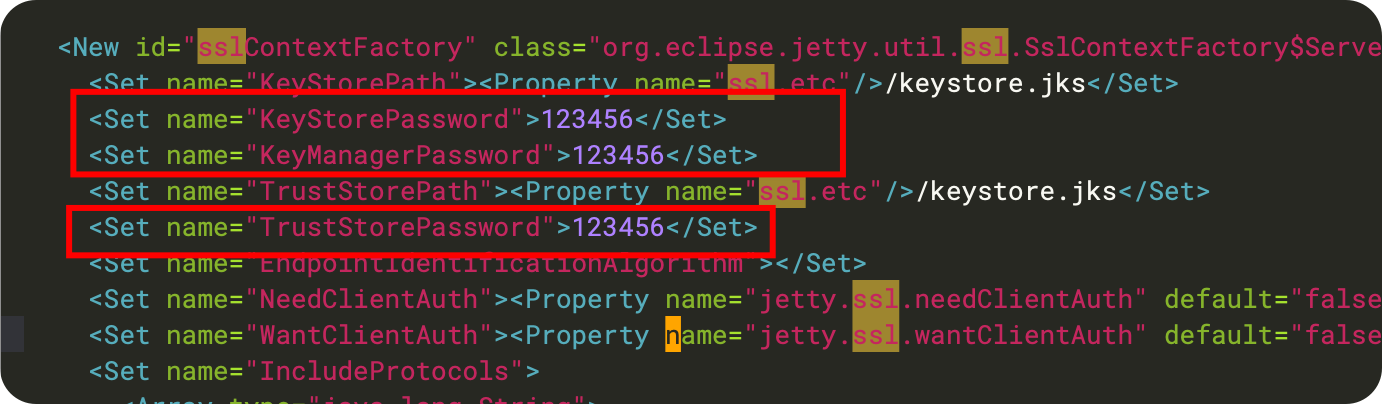
# 修改 jetty-https.xml 文件
文件所在目录:nexus-3.77.1-01/etc/jetty/jetty-https.xml
修改密码为我们刚刚设置的密码
# 修改nexus-default.properties
文件所在目录:nexus-3.77.1-01/etc/nexus-default.properties
修改内容
在nexus-args参数后追加{jetty.etc}/jetty-https.xml
新增配置application-port-ssl=18081
## DO NOT EDIT - CUSTOMIZATIONS BELONG IN $data-dir/etc/nexus.properties
##
# Jetty section
application-port=8081
application-port-ssl=18081
application-host=0.0.0.0
nexus-args=${jetty.etc}/jetty.xml,${jetty.etc}/jetty-http.xml,${jetty.etc}/jetty-requestlog.xml,{jetty.etc}/jetty-https.xml
nexus-context-path=/

# Nexus section
nexus-edition=nexus-pro-edition
nexus-features=\
nexus-pro-feature
2
3
4
5
6
7
8
9
10
11
12
13
启动/重启 Nexus
bin/nexus restart
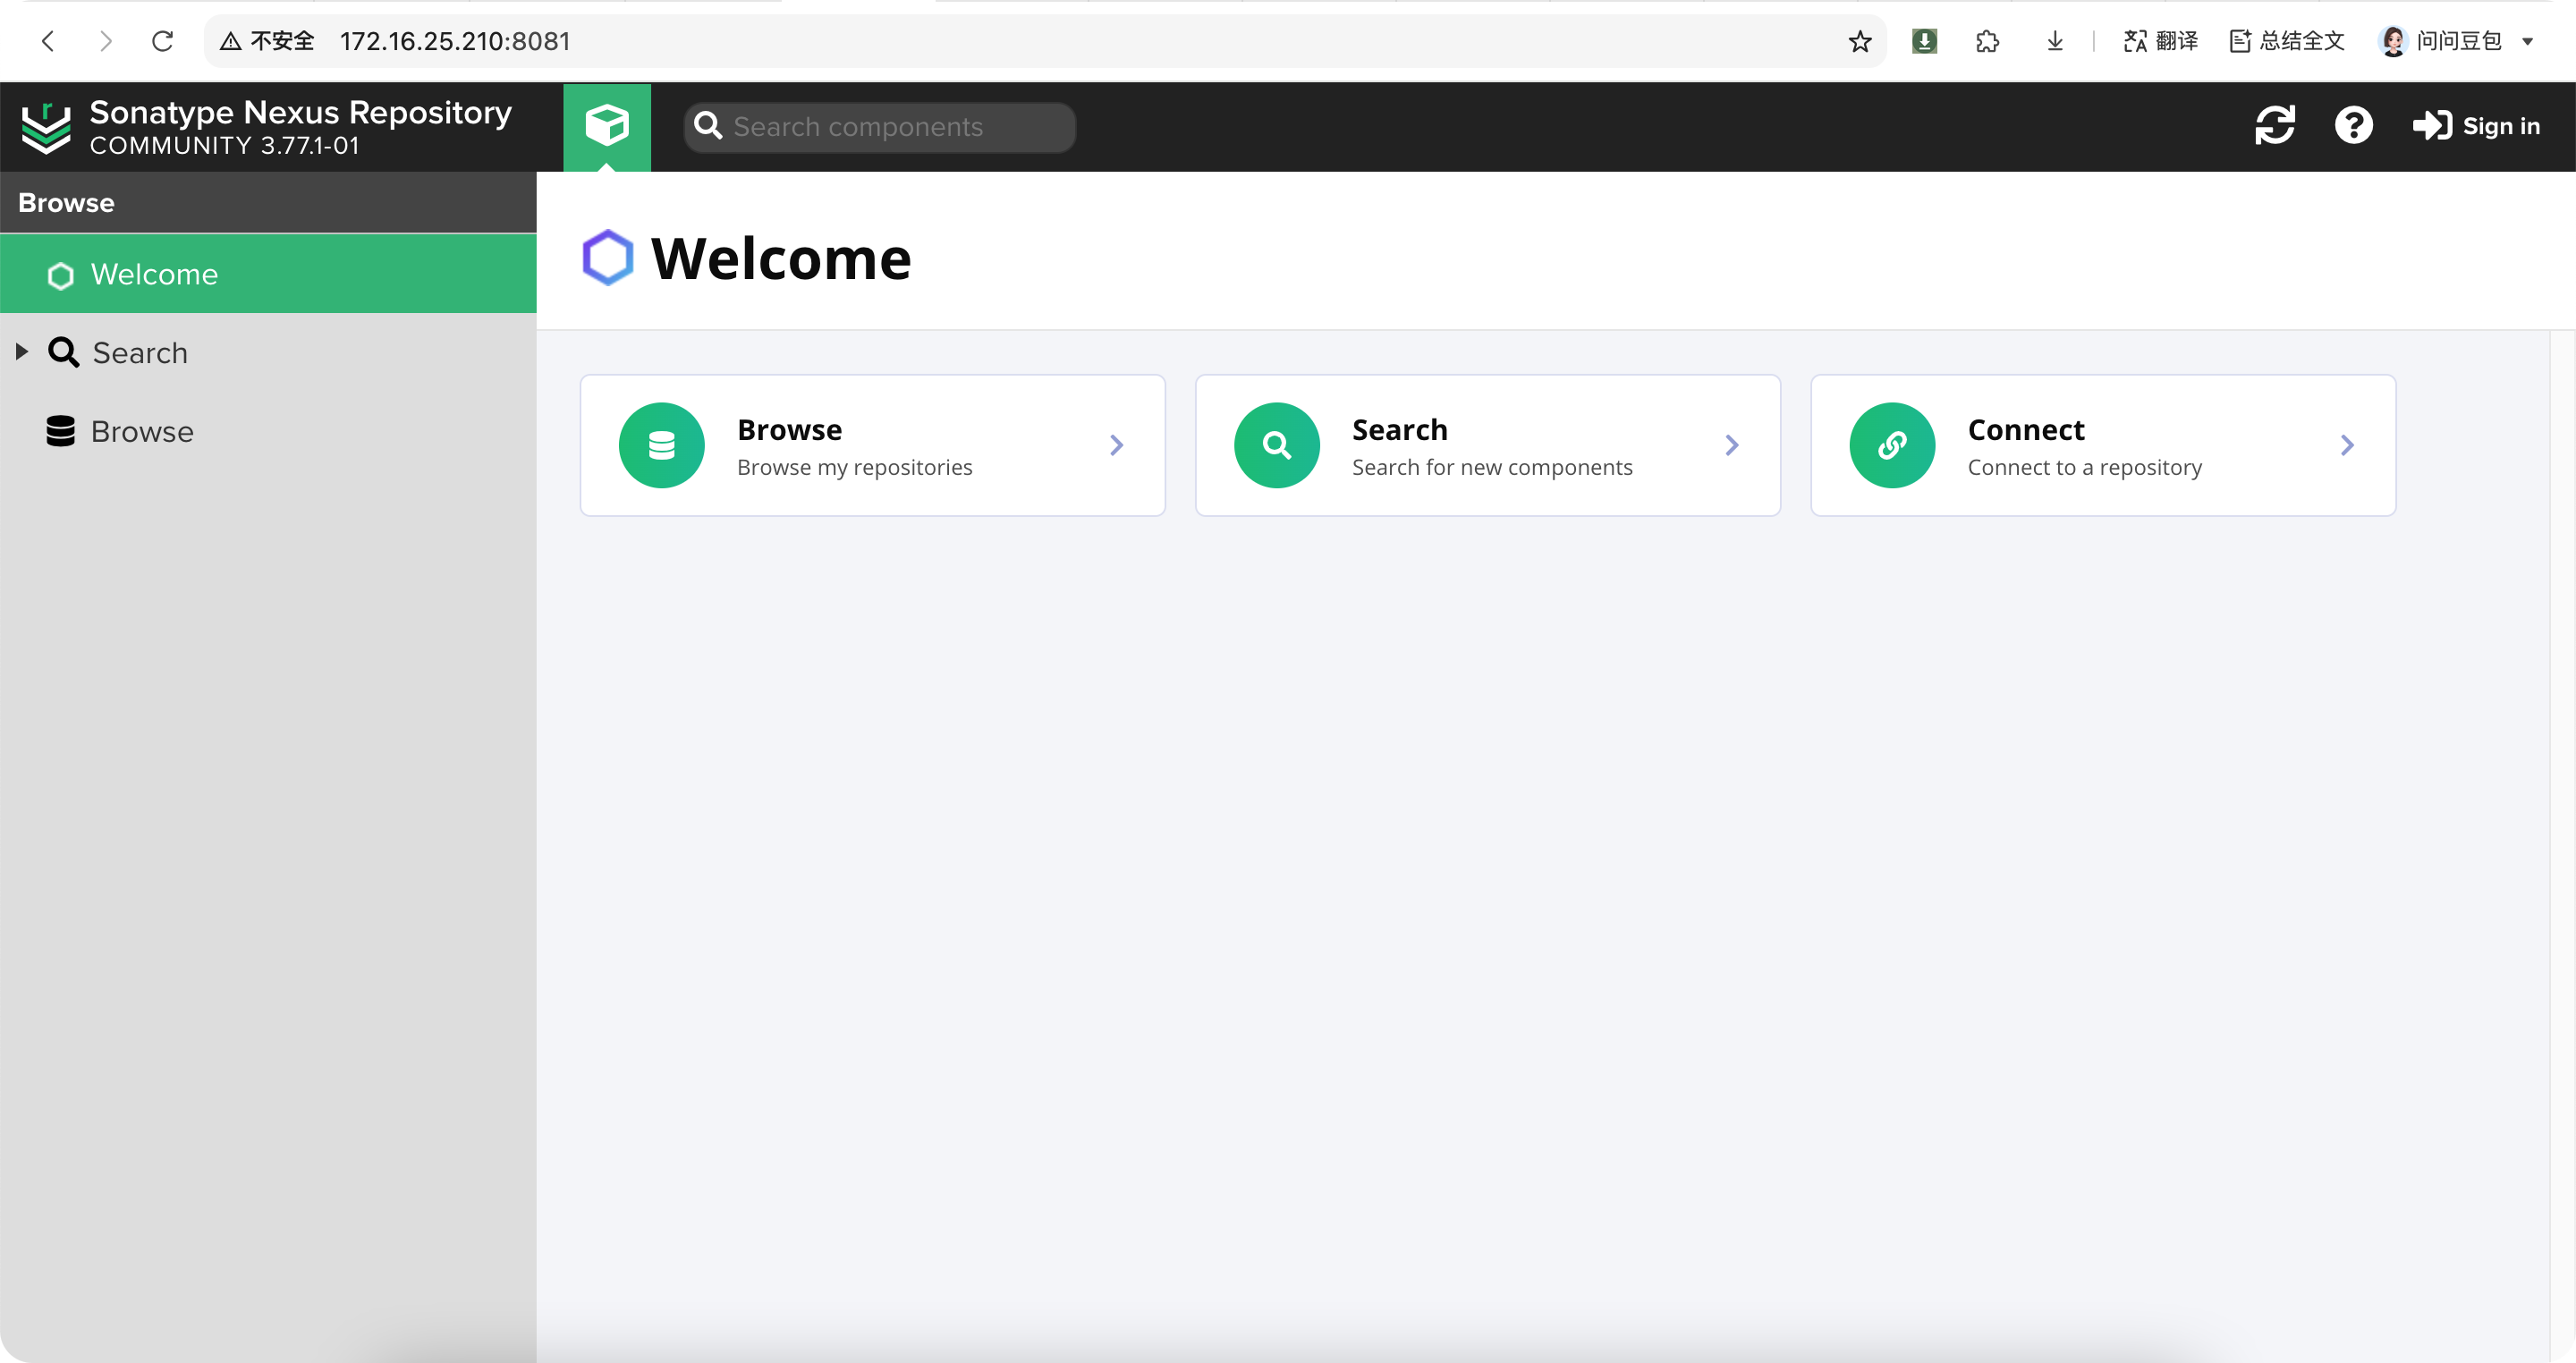
等待启动,启动成功后访问地址:http://ip:8081
日志位置:sonatype-work/nexus3/log
# 本地导入证书
因为我们申请的是不安全证书,这里我们需要在应用端电脑导入证书,通过JDK工具
下载证书server.crt到本地
Mac系统导入证书
keytool -import -alias nexus -keystore /Library/Java/JavaVirtualMachines/temurin-8.jdk/Contents/Home/jre/lib/security/cacerts -file server.crt -storepass changeit
导入证书的密码为:changeit
Windows系统导入证书
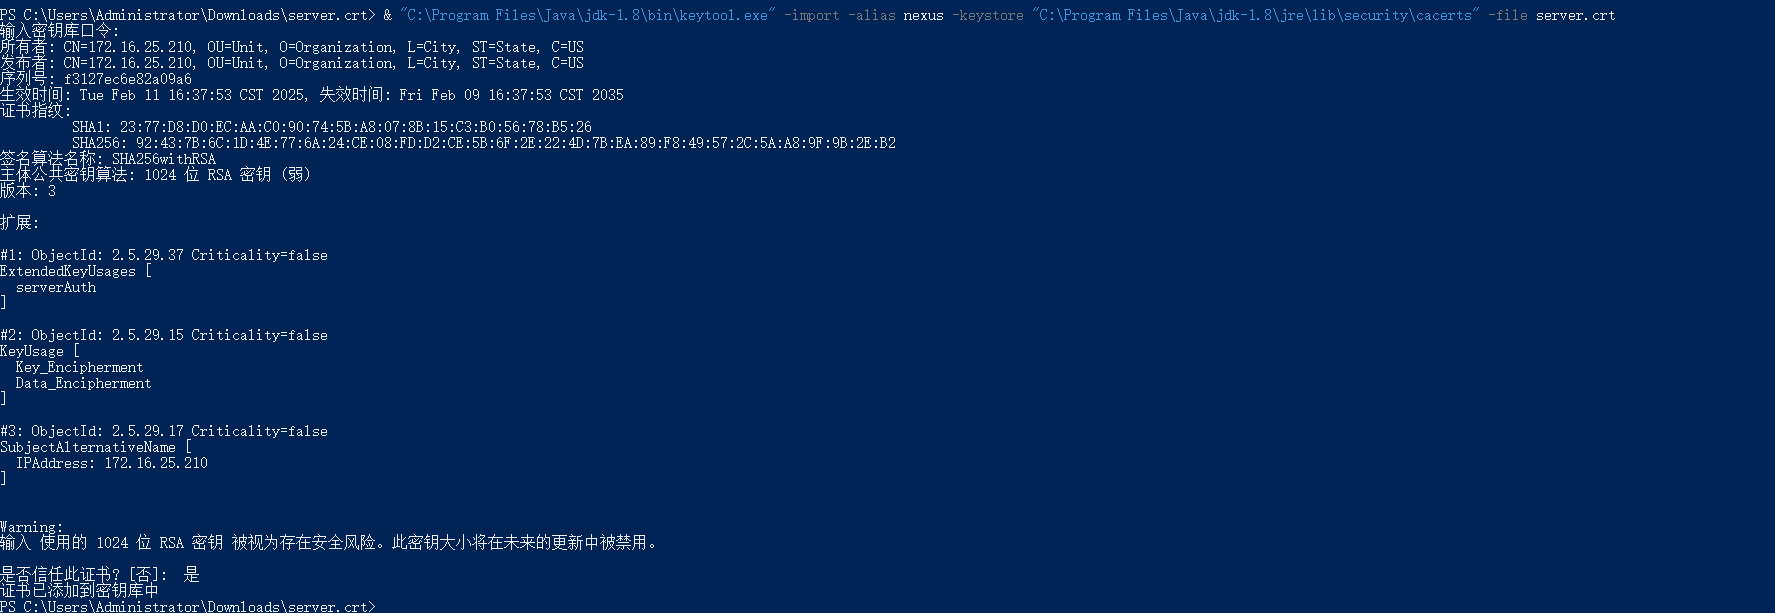
PowerShell执行
& "C:\Program Files\Java\jdk-1.8\bin\keytool.exe" -import -alias nexus -keystore "C:\Program Files\Java\jdk-1.8\jre\lib\security\cacerts" -file server.crt
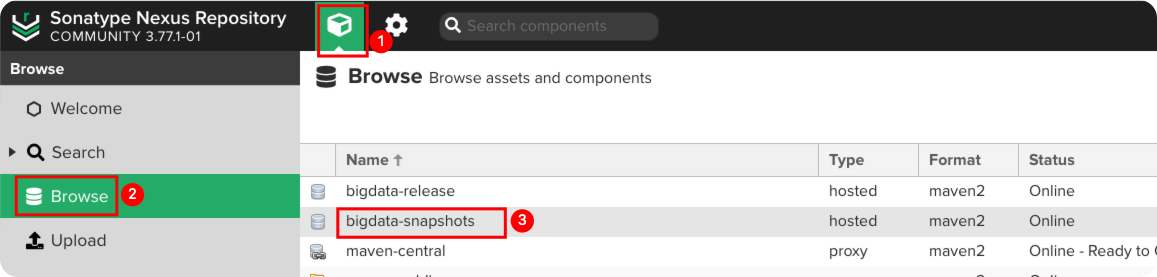
# 登录
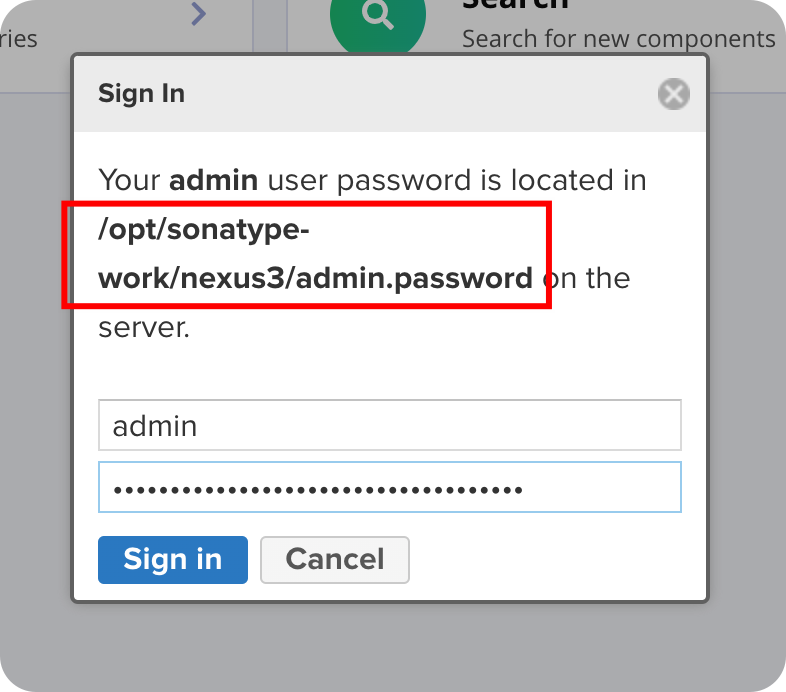
点击右上角登录,账号为:admin,密码在服务器sonatype-work/nexus3/admin.password文件中。
sonatype-work目录nexus安装目录为同级
首次登录时会提示你的密码在哪个文件中,如下图所示:
# Maven 仓库介绍
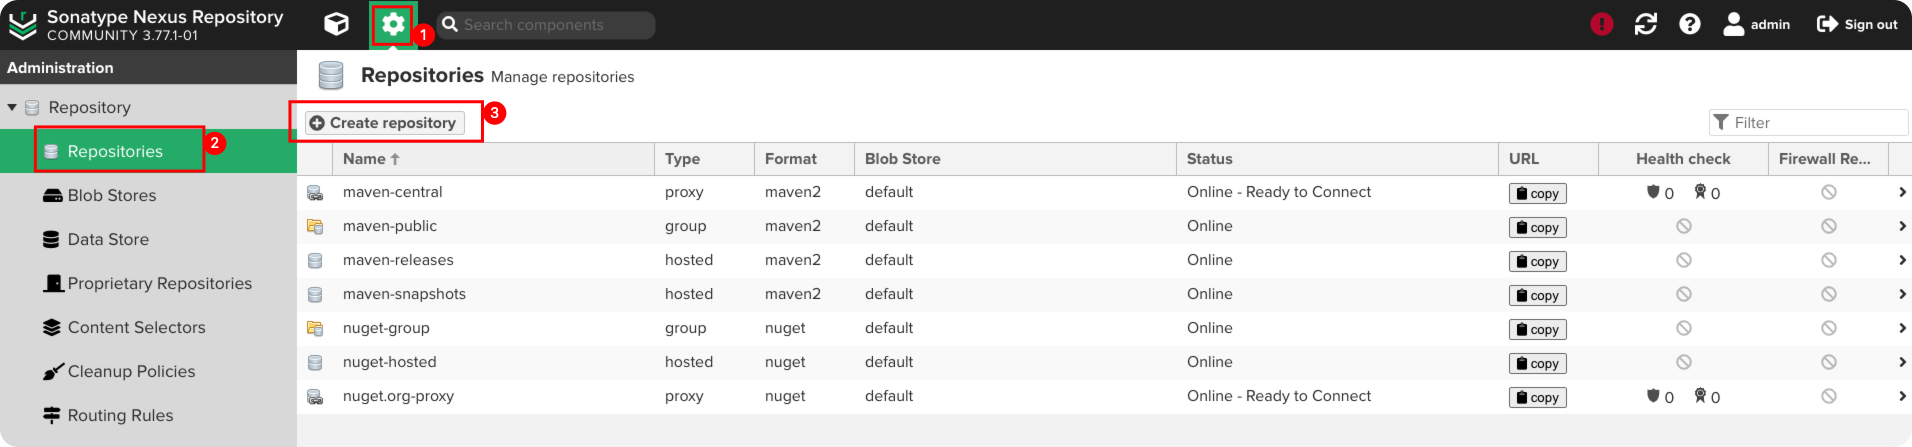
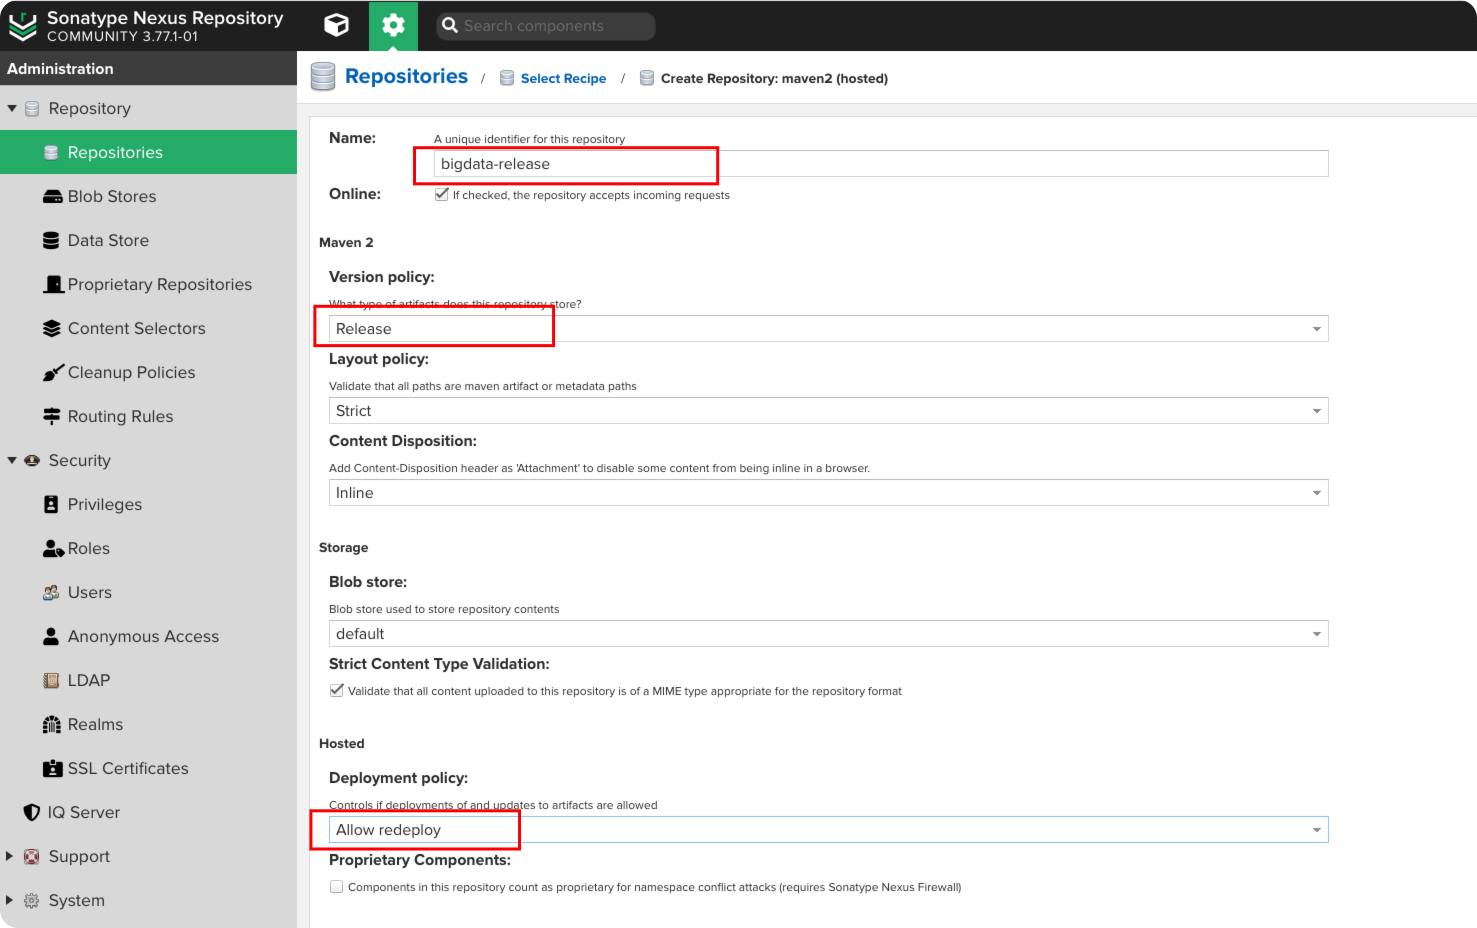
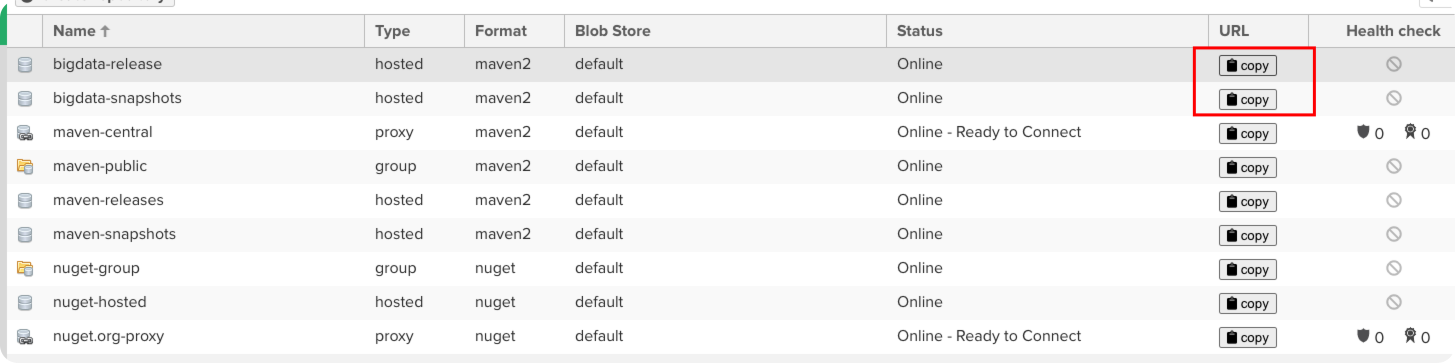
# 创建自定义仓库
我们自己开发的 Jar 包传到自定义仓库
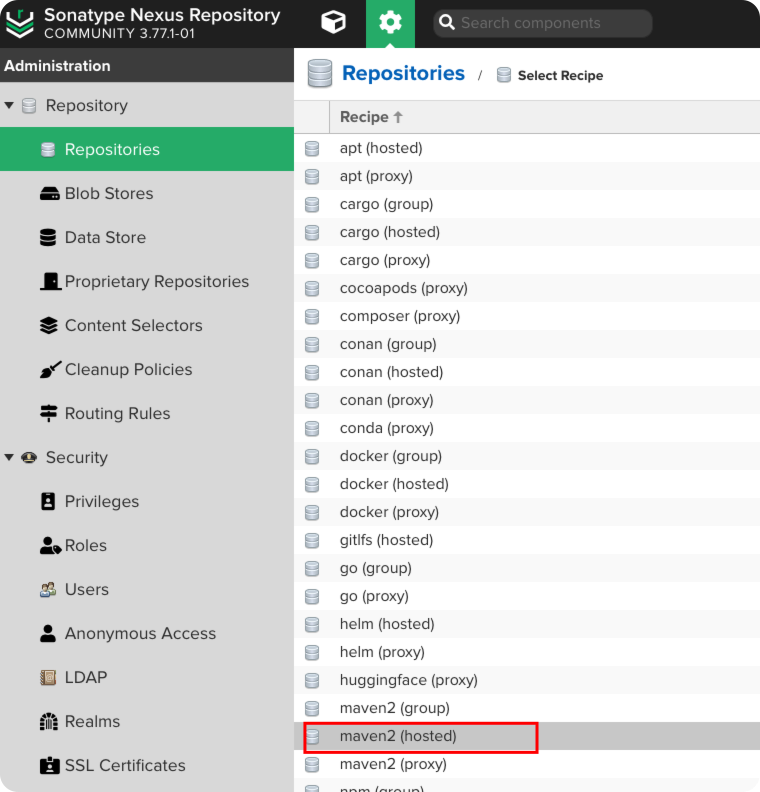
选择maven2(hosted)
填写信息
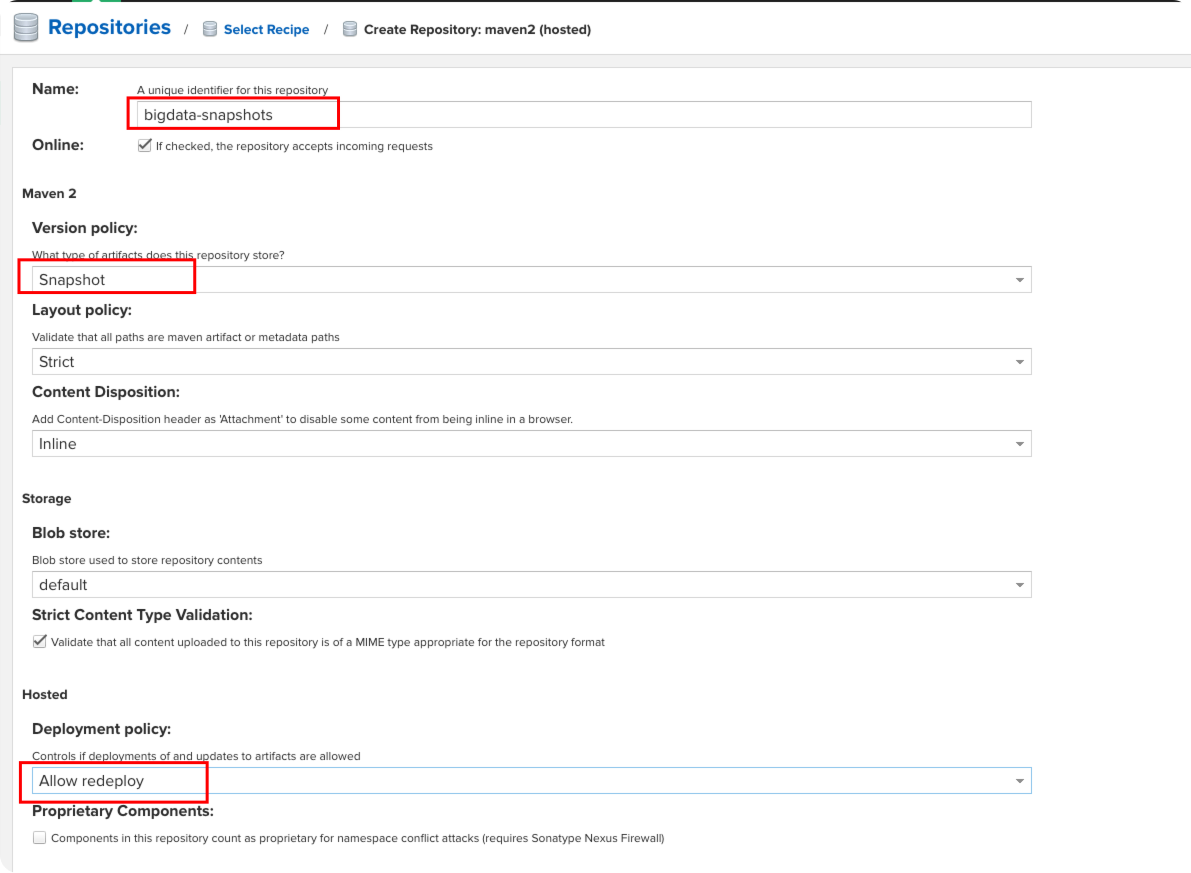
再创建一个snapshots仓库
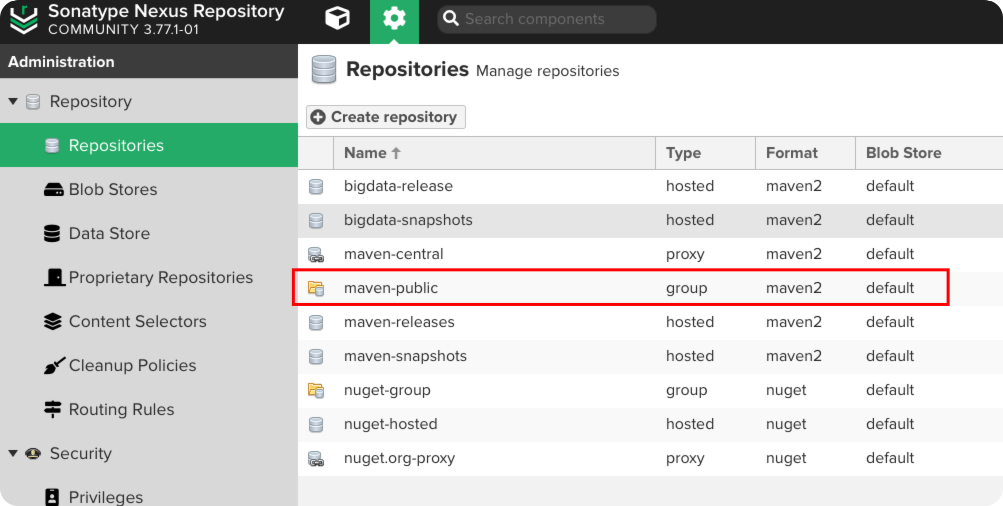
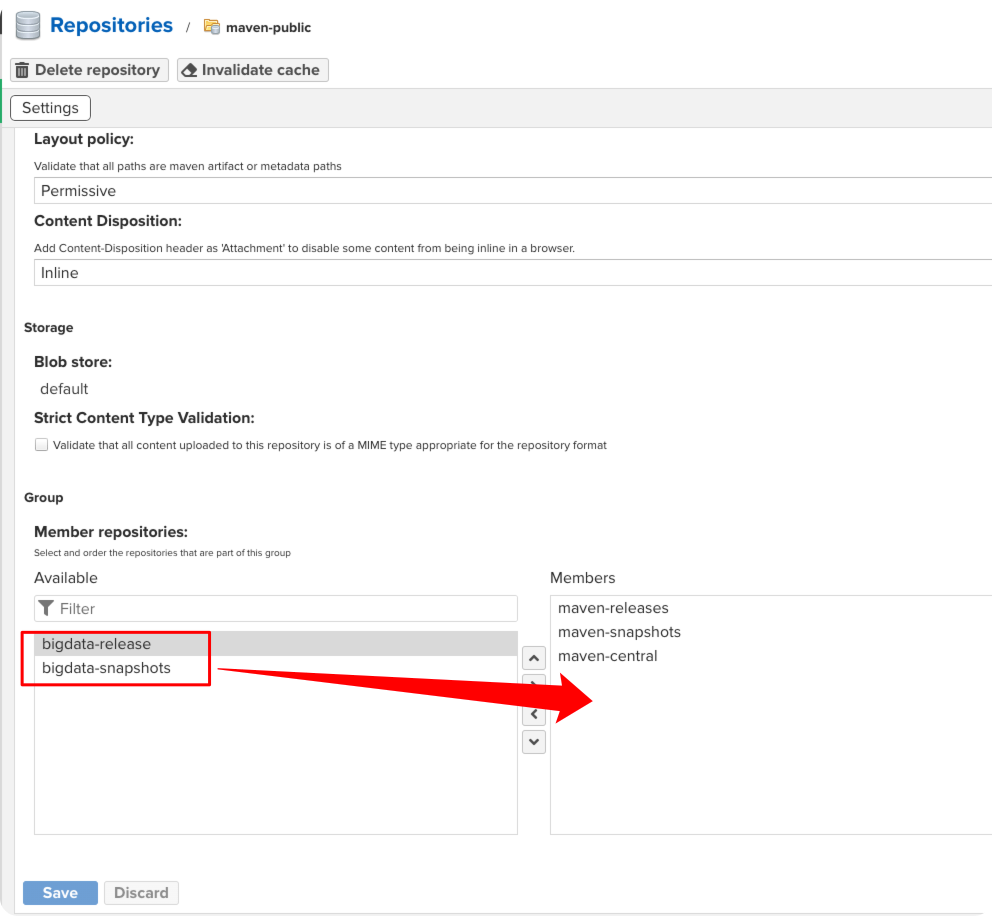
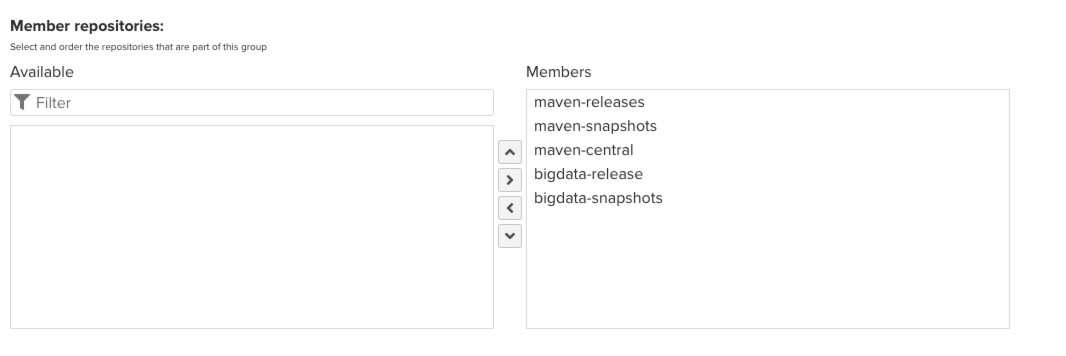
在仓库组maven-public中添加自定义仓库信息
# 发布 Jar 包到 Nexus
上面我们创建做了自定义仓库,复制这两个URL,当然如果你不想区分的那么细可以直接复制maven-releases和maven-snapshots的 URL,直接将包发布到这里。
这里我们用自定义的仓库演示,在项目的pom.xml中引用
<distributionManagement>
  <repository>
    <id>release-nexus</id>
    <url>https://192.168.1.1:4443/repository/bigdata-release/</url>
    <name>release-nexus</name>
  </repository>
  <snapshotRepository>
    <id>snapshot-nexus</id>
    <url>https://192.168.1.1:4443/repository/bigdata-snapshots/</url>
    <name>snapshot-nexus</name>
  </snapshotRepository>
</distributionManagement>
2
3
4
5
6
7
8
9
10
11
12
在本地的 Maven settings.xml
<server>
  <id>release-nexus</id>
  <username>admin</username>
  <password>password</password>
</server>

<server>
  <id>snapshot-nexus</id>
  <username>admin</username>
  <password>password</password>
</server>
2
3
4
5
6
7
8
9
10
11
随便创建一个工具类,然后执行mvn deploy
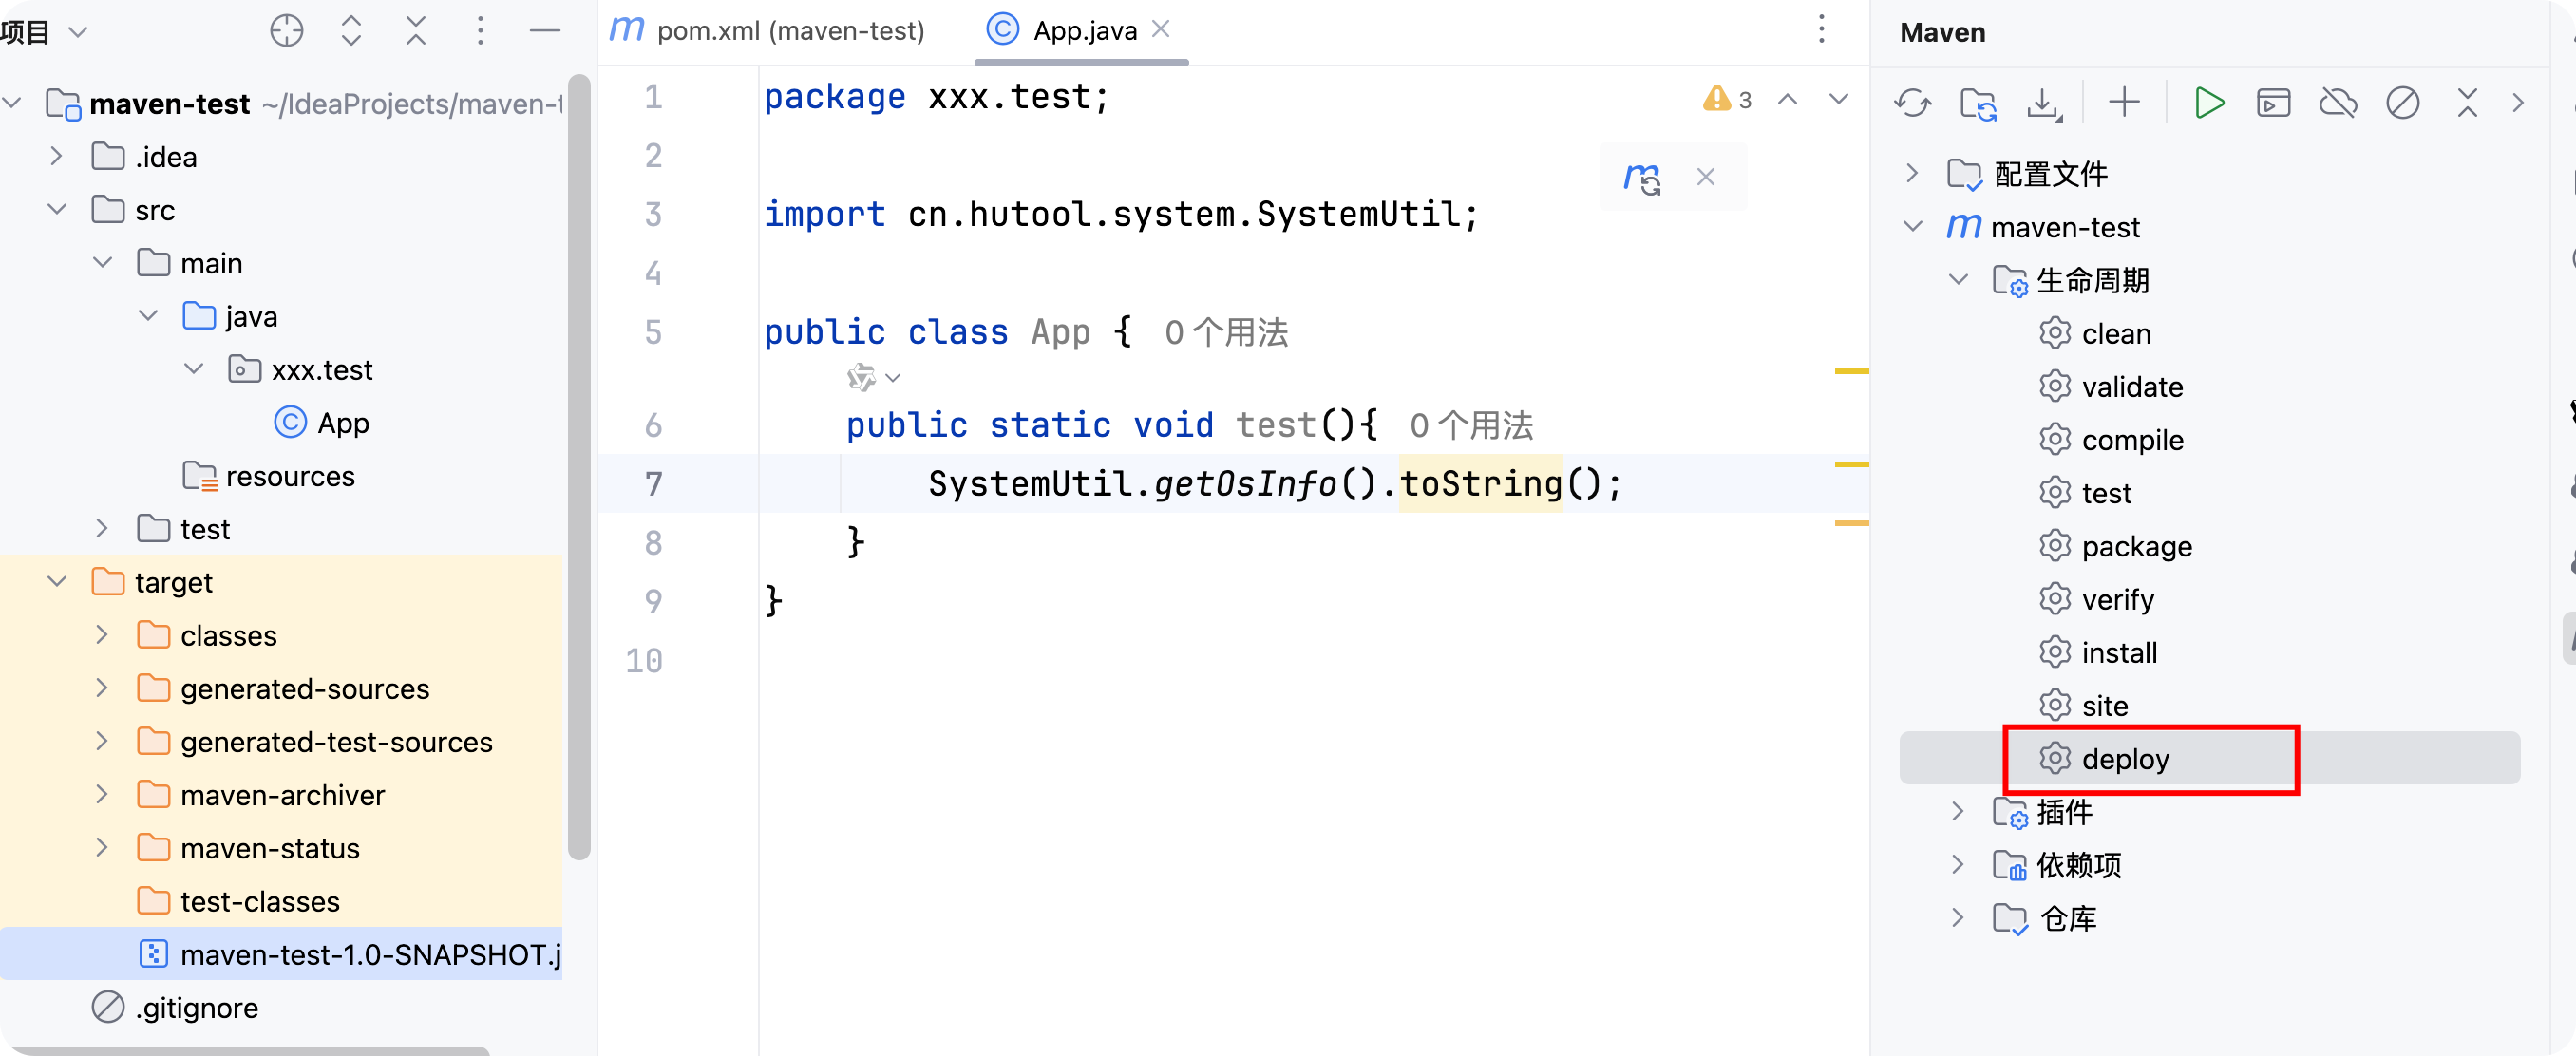
发布成功后我们在 Nexus 中查看
如果是发布快照版本,可以不修改版本号,能够根据时间自动生成多个版本
配置样例:
<version>1.0-SNAPSHOT</version>
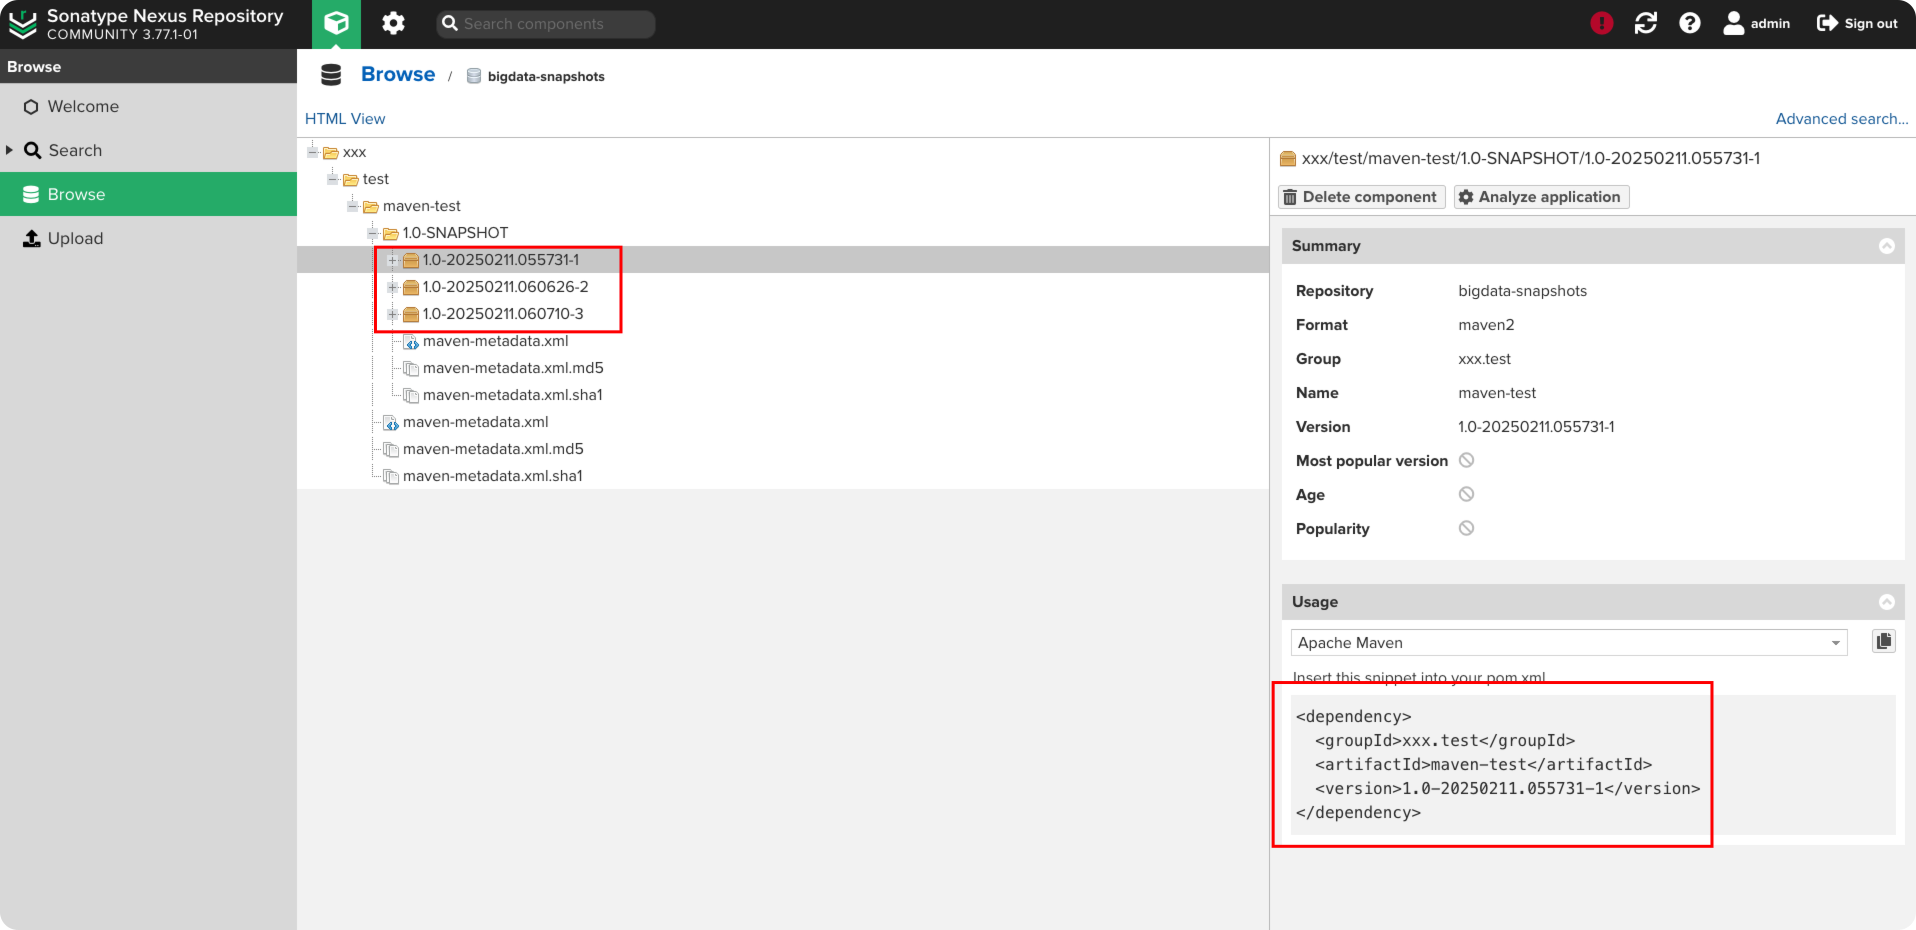
正式版本不以-SNAPHOST结尾即可。
<version>1.0</version>
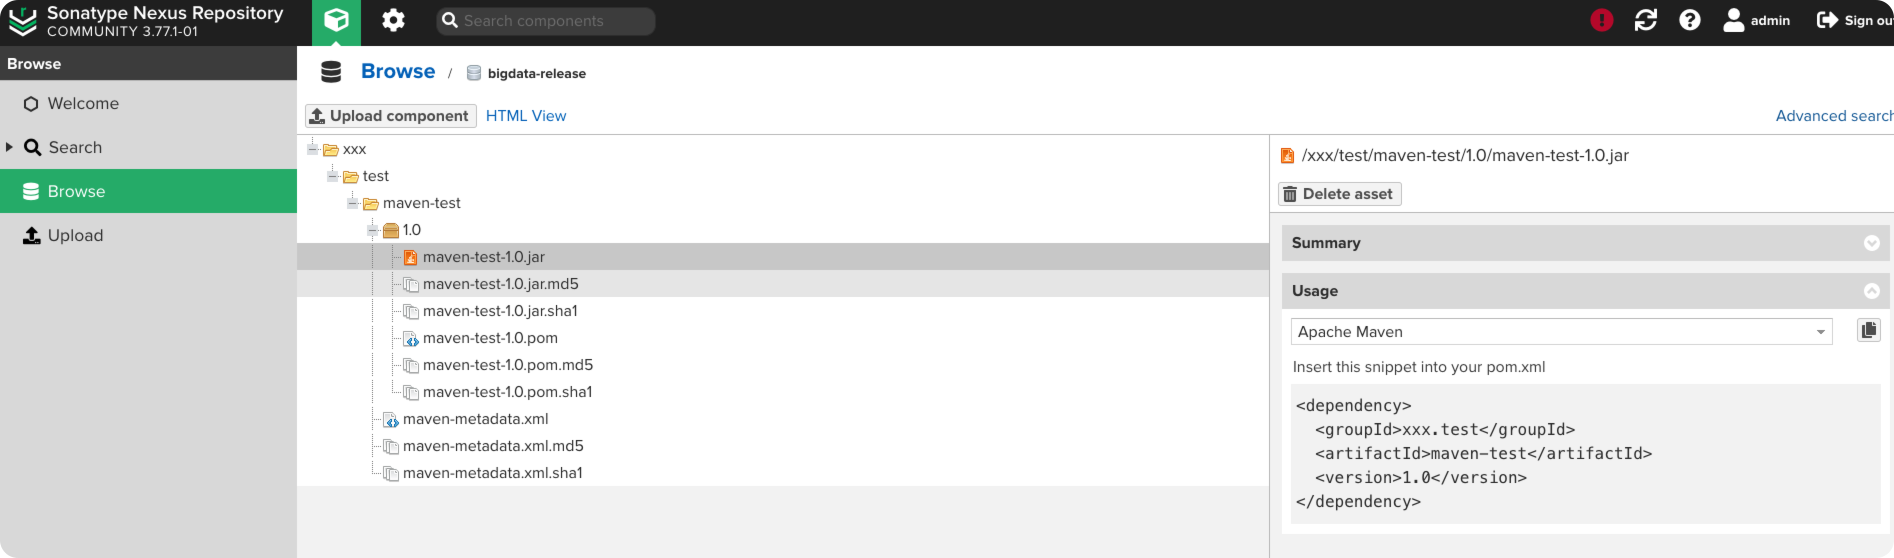
在 Nexus 中正式版本只保留一个,多次发布会覆盖历史版本。
# 项目下载使用Maven私服
在项目的pom.xml中配置
<repositories>
        <repository>
            <id>maven-nexus</id>
            <url>https://192.168.1.1:4443/repository/maven-public/</url>
            <releases>
                <enabled>true</enabled>
            </releases>
            <snapshots>
                <enabled>false</enabled>
            </snapshots>
        </repository>
    </repositories>

    <pluginRepositories>
        <pluginRepository>
            <id>maven-nexus</id>
            <url>https://192.168.1.1:4443/repository/maven-public/</url>
        </pluginRepository>
    </pluginRepositories>
2
3
4
5
6
7
8
9
10
11
12
13
14
15
16
17
18
19
之后就正常引用依赖就可以了。
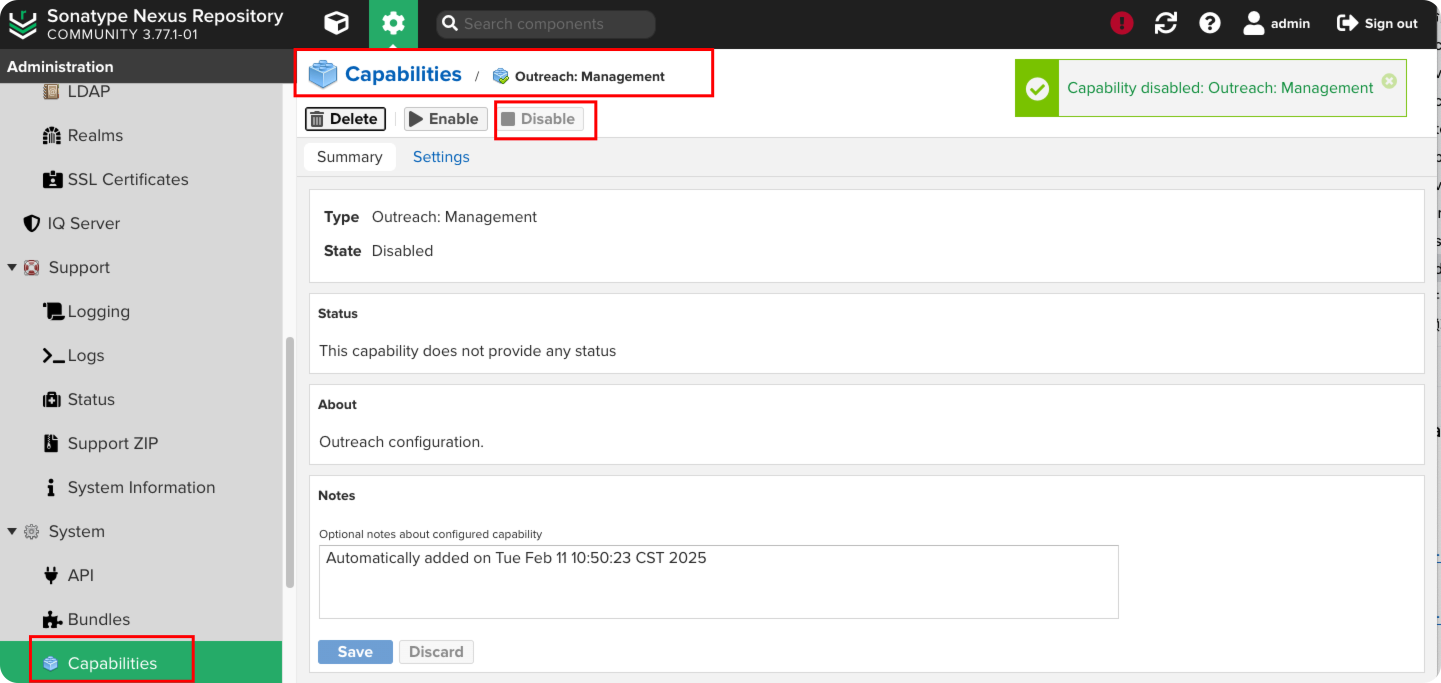
# 常见问题
# Connect to sonatype-download.global.ssl.fastly.net:443
com.sonatype.nexus.plugins.outreach.internal.outreach.SonatypeOutreach - Could not download page bundle
org.apache.http.conn.ConnectTimeoutException: Connect to sonatype-download.global.ssl.fastly.net:443 [sonatype-download.global.ssl.fastly.net/31.13.86.16] failed: connect timed out
	at org.apache.http.impl.conn.DefaultHttpClientConnectionOperator.connect(DefaultHttpClientConnectionOperator.java:151)
	at org.apache.http.impl.conn.PoolingHttpClientConnectionManager.connect(PoolingHttpClientConnectionManager.java:373)
	at org.apache.http.impl.execchain.MainClientExec.establishRoute(MainClientExec.java:381)
	at org.apache.http.impl.execchain.MainClientExec.execute(MainClientExec.java:237)
	at org.apache.http.impl.execchain.ProtocolExec.execute(ProtocolExec.java:185)
	at org.apache.http.impl.execchain.RetryExec.execute(RetryExec.java:89)
	at org.apache.http.impl.execchain.RedirectExec.execute(RedirectExec.java:111)
	at org.apache.http.impl.client.InternalHttpClient.doExecute(InternalHttpClient.java:185)
	at org.apache.http.impl.client.CloseableHttpClient.execute(CloseableHttpClient.java:83)
	at org.apache.http.impl.client.CloseableHttpClient.execute(CloseableHttpClient.java:108)
	at com.sonatype.nexus.plugins.outreach.internal.outreach.OutreachConnector.head(OutreachConnector.java:129)
	at com.sonatype.nexus.plugins.outreach.internal.outreach.SonatypeOutreach.remote(SonatypeOutreach.java:197)
	at com.sonatype.nexus.plugins.outreach.internal.outreach.SonatypeOutreach.getPageBundle(SonatypeOutreach.java:158)
	at com.sonatype.nexus.plugins.outreach.Outreach$getPageBundle.call(Unknown Source)
	at com.sonatype.nexus.plugins.outreach.internal.ui.OutreachComponent.readStatus(OutreachComponent.groovy:58)
2
3
4
5
6
7
8
9
10
11
12
13
14
15
16
17
18
解决方法:
关闭Outreach:Management,然后重启 Nexus