 内网穿透
内网穿透
[toc]
# NPS指南:简便稳定的内网穿透神器,开源免费!
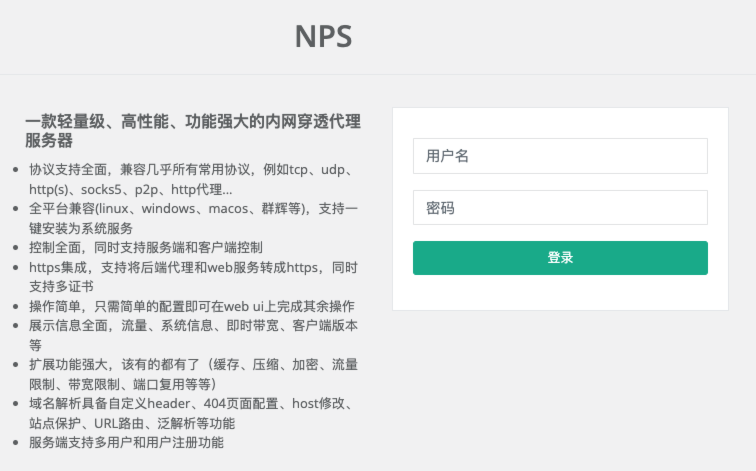
NPS在GitHub 30k Stars,是一款轻量级、高性能、功能强大的内网穿透代理服务器。支持Linux、Windows、Mac系统。
目前支持tcp、udp流量转发,可支持任何tcp、udp上层协议(访问内网网站、本地支付接口调试、ssh访问、远程桌面,内网dns解析等等……),此外还支持内网http代理、内网socks5代理、p2p等,并带有功能强大的web管理端。

# 各种模式下NPS的应用场景
NPS有多种模式可以用,下面是各模式的应用场景
- 域名代理模式:适用于微信公众号开发、小程序开发等场景。
- TCP代理模式:适用于通过外网使用SSH连接内网机器,或进行云服务器与内网服务器端口的映射。
- UDP代理模式:适用于非内网环境下使用内网DNS,或通过UDP协议访问内网设备的场景。
- HTTP代理模式:适用于在外网使用HTTP代理访问内网网站的需求。
- SOCKS5代理模式:适用于搭建内网穿透服务,如同VPN一样在外网访问内网资源或设备。
# 优势和特点
- 协议支持全面,兼容几乎所有常用协议,例如tcp、udp、http(s)、socks5、p2p、http代理...
- 全平台兼容(linux、windows、macos、群辉等),支持一键安装为系统服务
- 控制全面,同时支持服务端和客户端控制
- https集成,支持将后端代理和web服务转成https,同时支持多证书
- 操作简单,只需简单的配置即可在web ui上完成其余操作
- 展示信息全面,流量、系统信息、即时带宽、客户端版本等
- 扩展功能强大,该有的都有了(缓存、压缩、加密、流量限制、带宽限制、端口复用等等)
- 域名解析具备自定义header、404页面配置、host修改、站点保护、URL路由、泛解析等功能
- 服务端支持多用户和用户注册功能
# 官方说明文档
说明文档:https://ehang-io.github.io/nps/#/use
源码地址:https://github.com/ehang-io/nps
# 下载服务端安装包
wget https://github.com/ehang-io/nps/releases/download/v0.26.10/linux_amd64_server.tar.gz
解压
tar -zxvf linux_amd64_server.tar.gz
# 安装NPS
./nps install
安装完成后nps会到系统变量中,安装后的配置文件/etc/nps/conf/nps.conf
- 默认端口
nps默认配置文件使用了80,443,8080,8024端口
80与443端口为域名解析模式默认端口
8080为web管理访问端口
8024为网桥端口,用于客户端与服务器通信
# 配置文件参数说明
可以根据个人需要动态调整参数,/etc/nps/conf/nps.conf配置参数说明:
| 名称 | 含义 |
|---|---|
| web_port | web管理端口 |
| web_password | web界面管理密码 |
| web_username | web界面管理账号 |
| web_base_url | web管理主路径,用于将web管理置于代理子路径后面 |
| bridge_port | 服务端客户端通信端口 |
| https_proxy_port | 域名代理https代理监听端口 |
| http_proxy_port | 域名代理http代理监听端口 |
| auth_key | web api密钥 |
| bridge_type | 客户端与服务端连接方式kcp或tcp |
| public_vkey | 客户端以配置文件模式启动时的密钥,设置为空表示关闭客户端配置文件连接模式 |
| ip_limit | 是否限制ip访问,true或false或忽略 |
| flow_store_interval | 服务端流量数据持久化间隔,单位分钟,忽略表示不持久化 |
| log_level | 日志输出级别 |
| auth_crypt_key | 获取服务端authKey时的aes加密密钥,16位 |
| p2p_ip | 服务端Ip,使用p2p模式必填 |
| p2p_port | p2p模式开启的udp端口 |
| pprof_ip | debug pprof 服务端ip |
| pprof_port | debug pprof 端口 |
| disconnect_timeout | 客户端连接超时,单位 5s,默认值 60,即 300s = 5mins |
# 启动
./nps start
如果发现没有启动成功,可以查看日志(Windows日志文件位于当前运行目录下,linux和darwin位于/var/log/nps.log)
- 访问服务端ip:web服务端口(默认为8080)
- 使用用户名和密码登陆(默认admin/123,正式使用一定要更改)
- 创建客户端
# 服务端配置文件重载(目前支持功能不多)
对于linux、darwin
sudo nps reload
对于windows
nps.exe reload
说明: 仅支持部分配置重载,例如allow_user_login auth_crypt_key auth_key web_username web_password 等,未来将支持更多
# 服务端停止或重启
对于linux、darwin
sudo nps stop|restart
对于windows
nps.exe stop|restart
# 客户端应用
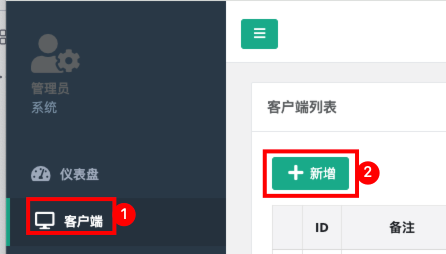
# 先在网站中创建客户端
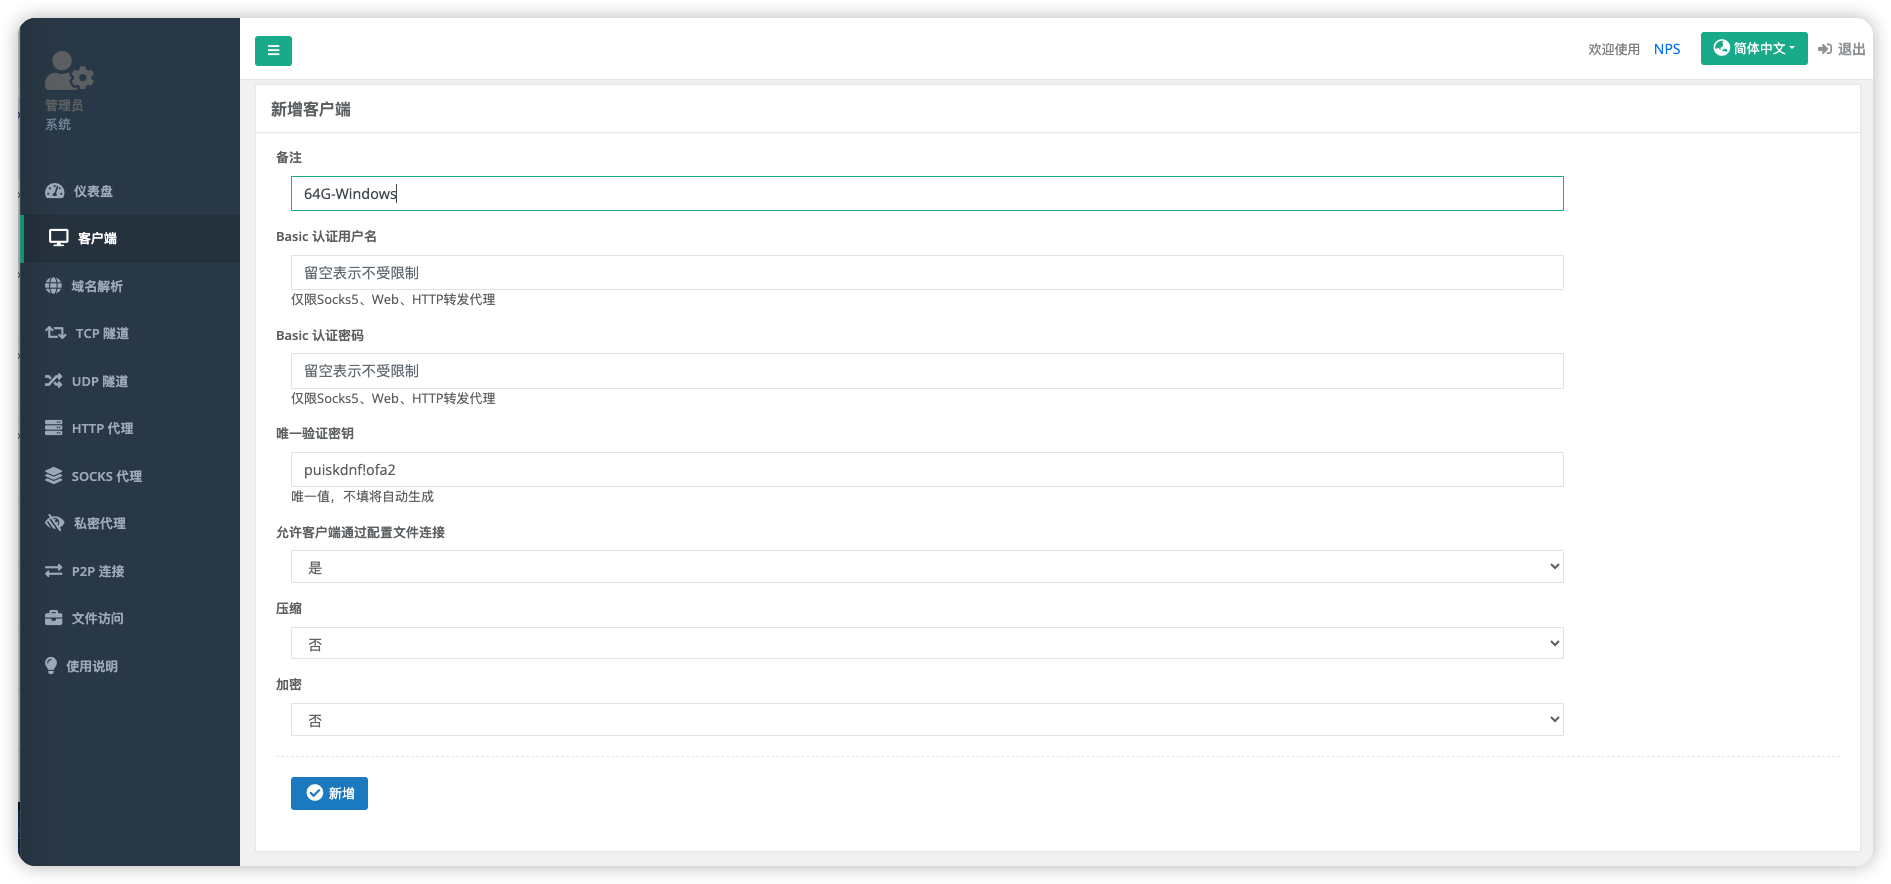
这里可以自己设置,也可以全部使用默认


新增成功后在页面可以看到客户端列表。此时我们创建完可以看到连接状态为离线,接下来我们注册客户端就可以。

# CentOS
# 下载客户端
wget -b https://github.com/ehang-io/nps/releases/download/v0.26.10/linux_amd64_client.tar.gz
解压
tar -zxvf linux_amd64_client.tar.gz
# 方法一:客户端无配置文件启动
./npc -server=${您服务器的IP地址}:${bridge_port} -vkey=${vkey}
${您服务器的IP地址}是您要连接的 NPS 服务器的公网 IP 地址。${bridge_port}是 NPS 服务器的通信端口,通常在服务器端的配置中定义。-vkey=${vkey}: 指定 NPS 客户端的验证密钥。这是服务器和客户端进行通信时的身份验证信息,必须与服务器的配置匹配。取Web页面中显示的密钥
# 方法二:配置文件启动
这里用Tcp模式举例,填写配置文件
[common]
# 填写登录后首页显示的客户端连接端口
# 也就是:
# ${您服务器的IP地址} 是您要连接的 NPS 服务器的公网 IP 地址。
# ${bridge_port} 是 NPS 服务器的通信端口,通常在服务器端的配置中定义。
server_addr=${您服务器的IP地址}:${bridge_port}
conn_type=tcp
# vkey填写上面的验证密钥
vkey=xxxxx
# 断线重连
auto_reconnection=true

[tcp]
# 模式
mode=tcp
# 需要转发的地址
target_addr=127.0.0.1:8080
# NPS对外提供的服务端口
server_port=18888
2
3
4
5
6
7
8
9
10
11
12
13
14
15
16
17
18
19
说明:
| 项 | 含义 |
|---|---|
| mode | tcp |
| server_port | 在服务端的代理端口 |
| tartget_addr | 内网目标 |
启动
nohup ./npc -config=conf/npc.conf &
[I] [npc.go:231]  the version of client is 0.26.10, the core version of client is 0.26.0
[I] [control.go:97]  Loading configuration file conf/npc.conf successfully
[N] [control.go:174]  web access login username:user password:xxx
[I] [client.go:72]  Successful connection with server xxx:18888
2
3
4
此时通过我们公网的地址进行访问就可以了。
# Windows客户端
# 下载Windows客户端
# 新建客户端

填写唯一验证密钥

TCP隧道配置

配置TCP隧道模式
npc.conf
[common]
server_addr=${你的服务器公网IP地址}:${bridge_port}
conn_type=tcp
vkey=puiskdnf!ofa2
auto_reconnection=true
max_conn=1000
crypt=false
compress=false
disconnect_timeout=60


[tcp]
mode=tcp
target_addr=3389
server_port=28085
2
3
4
5
6
7
8
9
10
11
12
13
14
15
直接双击npc.exe会自动读取conf/npc.conf配置文件
windows启动配置
./npc.exe -server=${你的服务器公网IP地址}:${bridge_port} -vkey=xxx -config=C:\Users\Admin\Desktop\windows_amd64_client\conf\npc.conf
通过远程连接连接Windows服务器即可
# 配置Windows开机自动启动远程
创建启动脚本start-npc.bat
# 这一段是后台运行的命令
@echo off
if "%1" == "h" goto begin
mshta vbscript:createobject("wscript.shell").run("%~nx0 h",0)(window.close)&&exit
:begin

# 这一段是启动
cd C:\Users\Admin\Desktop\windows_amd64_client
.\npc.exe -server=${你的服务器公网IP地址}:28083 -vkey=puiskdnf!ofa2 -config=C:\Users\Admin\Desktop\windows_amd64_client\conf\npc.conf
pause
2
3
4
5
6
7
8
9
10
主要两个步骤:
- 进入npc目录
- 启动npc.exe并制定配置文件路径
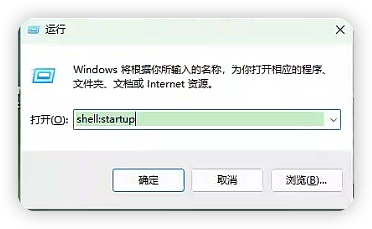
在电脑运行中输入shell:startup

自动打开这个目录

将start-npc.bat文件或者start-npc.bat文件的快捷方式,拖入这个目录下,就完成了开机自动启动配置。
# Mac 客户端
下载地址:https://github.com/ehang-io/nps/releases/download/v0.26.10/darwin_amd64_client.tar.gz
其他步骤与Linux相同
